Thursday, November 15, 2012

Homemade Cranberry Sauce


Is there anything like a delicious, made from scratch Thanksgiving meal? Many people settle for the stuff that comes out of a can or a box, and that's just it, it's settling. If you find yourself to be one of those people that is settling, I would highly recommend this year you give the homemade alternative to the pre-packaged and processed Thanksgiving foods a try. The two are a night and day difference. Like this for instance, one comes in the shape of a can while it's homemade opponent has a spoonable texture and begins with fresh fruit. Not to mention this is unbelievable easy to prepare. 
Cranberry sauce and turkey were made to be together. It's another Thanksgiving must. Here's a few random ideas if you happen to have any left over cranberry sauce after the holiday:
  • spread over toast or pancakes
  • serve warm over chocolate or vanilla ice cream
  • spread in a turkey sandwich 
  • make into a dressing or vinaigrette
  • spread over a cream cheese layered bagel
  • add to a fruit smoothie
  • use it as a dip for chicken nuggets/sticks
  • serve with roasted chicken or pork chops
  • make a tangy and tart barbecue sauce with it
  • spread over cheesecake
  • add it to a chicken or turkey salad
  • layer cheese slices or cream cheese over crackers and spread with cranberry sauce
  • mix in breakfast oatmeal and top with whipped cream
Cranberry Sauce

Ingredients:
1 (12 oz) bag cranberries, rinsed
1/2 cup water
1/2 cup freshly squeezed orange juice
1/2 cup granulated sugar
1/2 cup light-brown sugar
1 tsp orange zest

Directions:
In a medium sauce-pan set over medium-high heat, whisk together water, orange juice, granulated sugar, light-brown sugar and orange zest. Bring mixture to a boil then carefully pour in cranberries and reduce heat to a simmer. Allow mixture to simmer about 10 - 12 minutes, stirring occasionally, until cranberries have popped (they skin on the cranberries will burst and it will release the juices and pulp, in other words they'll pop open). Allow mixture to cool about 20 - 30 minutes. Store in refrigerator in an airtight container. 

Recipe Source: Cooking Classy
Share:

Wednesday, November 14, 2012

Browned Butter Sweet Potato Casserole


I'm not a huge casserole fan but this is the best sweet potato thing I've ever eaten! It's time for dinner and I would rather just skip the dinner meal and have a heaping plate of this in its place. I would be happy if this were the only thing I had to eat for the thanksgiving feast =). 
Growing up I never cared for sweet potato anything but that has definitely changed. Now I say it's a Thanksgiving must! It's basically a dessert that passes for a side, so how could you not love it? 
This recipe is a pretty basic recipe. I chose not to add in any spices, cream, citrus or even vanilla because I didn't want to drown out any of that incredible browned butter flavor. Some of you may be thinking this girl puts browned butter in everything. And I say, well why not? My motto: if it's going to have butter it may as well be browned. There are some exceptions to that but not many. Browned butter enhances everything that's lucky enough to contain it's goodness. When it's added to something along with brown sugar it seems to give it a caramel-y flavor. Another highlight of make this recipe is that you won't need to light any scented candles for the holiday =). To me browned butter is basically the best scent in the world. I want to cook it sometimes just so my home can be filled with it's captivating, delightfully fragrant, nutty, caramel-like smell. Does it come in perfume?
The other thing I chose to do with this recipe is yo use two toppings. Why stick with just one? That way it gives people two options to choose from, the marshmallow or crunchy pecan corn flake topping. I always take a scoop that has half of each because I love them both. Enjoy and Happy Holidays!


Browned Butter Sweet Potato Casserole
Yields about 12 servings

Ingredients:
5 lbs sweet potatoes
1/2 cup salted butter, diced into 1-inch pieces
1/2 cup granulated sugar
1/4 cup packed light-brown sugar
1/4 tsp salt
3 large eggs
1/3 cup milk

Topping:
2 1/4 cups crushed corn flakes (begin with about 5 cups and crush to about 2 1/4 cups)
1/2 cup chopped pecans (I used pre-chopped pecan chips to save time)
1/4 cup packed light-brown sugar
1/4 cup salted butter, diced into 1-inch pieces
3 cups miniature marshmallows

Directions:
Preheat oven to 400 degrees. Pierce each sweet potato several times with a fork and transfer to a rimmed cookie sheet. Bake about 1 hour, or until very tender when pierced with a fork. Meanwhile brown 1/2 cup butter in a medium saucepan over medium heat, swirling pan occasionally (for stages of browning butter see notes below).
Remove potatoes from oven and reduce oven temperature to 350. Cut each in half and scoop out flesh into a large mixing bowl. Mash potatoes with a potato masher. Pour in 1/2 cup browned butter, using a rubber spatula to scrape excess butter from pan, add granulated sugar, 1/4 cup light-brown sugar and salt then using an electric hand mixer set on low speed, blend together until well combine. Add in eggs and mix until well blended, then pour in milk and mix until well blended. Pour mixture into a buttered 13 x 9 baking dish and spread into an even layer. 
Brown remaining 1/4 cup butter in a saucepan. Pour crushed cornflakes into a mixing bowl, along with chopped pecans and 1/4 cup light-brown sugar and mix to combine. Pour browned butter over mixture and toss to evenly coat. Spread mixture into diagonal rows over mashed sweet potato mixture leaving about a 1 1/2-inch gap between rows. Bake in preheated oven (350 degrees) for 30 minutes, then remove from oven and spread marshmallows between rows of corn flake topping. Return to oven and bake until marshmallows are lightly golden about 8 - 12 minutes (I didn't brown mine much because I like the contrast of color between the white of the marshmallow and golden brown of the corn flake topping). Serve warm. Store in refrigerator in an airtight container.

Stages of browning butter: butter will first melt, it will become lemony yellow and after a minute or two it will begin to splatter a bit, then it will foam and begin to smell nutty, then little brown specks will begin to appear in the center of the golden foamy bubbles - this is when you remove it from heat. I wait just a few seconds for a generous amount of specs maybe a 2-inch circle before removing from heat. Color wise it should go from a yellow, to golden tan, to an orange-y toasty golden brown. I personally like to push it to the limit before removing from heat to get a really nice browned flavor, be sure you don't take it off too early while also not waiting too long.

Note that if you are making this in advance to refrigerate then bake the following day, don't add the corn flake topping until baking or it will become stale. Also I'd recommend placing cold casserole in cool oven and let it preheat with oven. 

Recipe Source: Cooking Classy


Share:

Thursday, November 1, 2012

Mom's Mashed Potatoes


With Thanksgiving just a few weeks away I'm so excited to start the month off right and be a part of such a fun virtual progressive dinner! So I want to say thank you to Mother Huddle for asking me to be part of such a great event!
Now regarding this recipe, I need to begin by saying, Mom, you were right. Didn't want to admit it but you are. Cooking the potatoes in the smallest amount of water possible yields better results then covering them entirely with water when cooking them. I know we've had our separate opinions on this but I'd have to say I think the "Food Network" may not always be right :). 
I made potatoes on Sunday, covering them entirely with water to cook, as I usually do because that's what I've always seen them do on Food Network and read in the directions of countless recipes, so I just assume that's the right method. If you ask me, there is no right and wrong way of cooking. They are all just opinions, but yes some methods yield better results then others. Well, my Sunday potatoes were much more "water logged" as my mom calls it, than this batch of mashed potatoes I made today cooking them in a smaller amount of water. My mom always said, cooking them in a small amount of water (basically creating a steam bath) will give you better mashed potatoes. I think it's true and it makes sense too. If you cover them entirely with water I think you are basically boiling off many of the starches and flavors and filling them with water. The key is to use just a few cups of water while keeping an eye on the water level as they cook to make sure you water doesn't completely evaporate, or yes they will burn. 
My Grandpa was a potato farmer so I hope my family knows a thing or two about cooking potatoes :). Growing up, we rarely missed a Sunday of meat and potatoes. My mom always made a Sunday roast and served mashed potatoes with gravy alongside it. And as far as instant potatoes go, I didn't even know that they existed until my late teens because my mom didn't believe in them. 
I've adapted what my mom taught me about making mashed potatoes to go along with a few ideas of my own, to create what I believe are the perfect mashed potatoes. This was always one of those recipes of my mom's that was a bit of this and a little of that until the consistency was where she wanted. She didn't ever heat the milk and cream but I like to so the potatoes don't cool off so quickly. I also decided to add the butter first, while mashing and before the liquids are added because it seems to give them a silkier and creamier texture. The butter seems to adhere to the potatoes. These are the potatoes you are going to want to serve this Thanksgiving, covered with that homemade Turkey gravy. I'm telling you my mom has always made the best potatoes! They are amazingly creamy, silky, fluffy and smooth, with just the right amount of richness and an incredibly delicious flavor. They are Heavenly. Enjoy! 
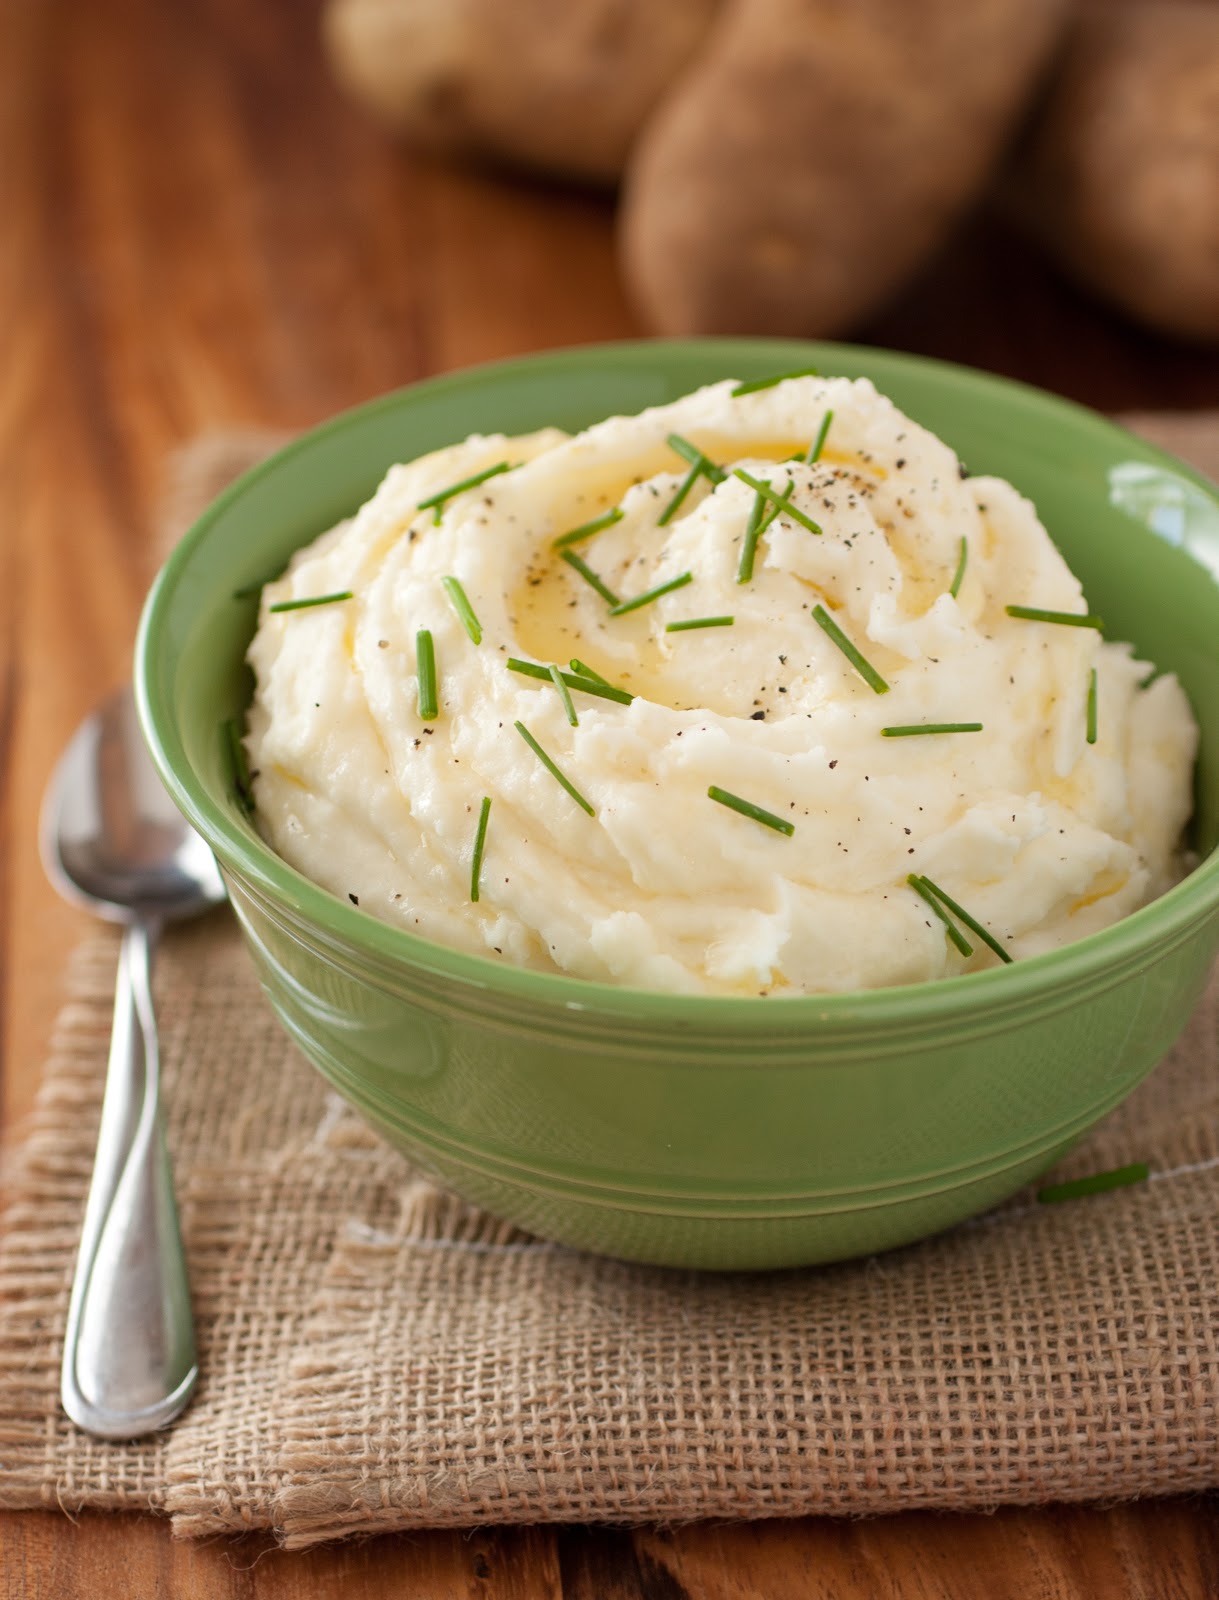


Mom's Mashed Potatoes
Yields about 8 servings

4 lbs Russet Potatoes (about 8 medium potatoes)
1/3 cup butter, melted
1 cup heavy cream
1/2 cup milk, preferably 2% or whole
1/2 cup sour cream
1 tsp salt, then to taste
freshly ground black pepper to taste

Directions:
Peel, rinse and dice potatoes into large chunks (I diced my medium potatoes into 6 pieces total). Fill an 8 quart saucepan with 2 2/3 cups cold water (pan should have about 1/2-inch of water). Add diced potatoes to cold water. Heat potatoes over high heat, stirring occasionally, until water begins to boil. As soon as water begins to boil, reduce heat to medium high and cover pan with lid and cook about 20 - 25 minutes, stirring once halfway through cooking and keeping a close eye on the water level (2 2/3 cups was the perfect amount for me, but if your pan doesn't have a fairly tight fitting lid then a lot of water may evaporate and escape so you may need to add about 1/2 cup more hot tap water to prevent potatoes from burning), until potatoes are very tender when pierced with a fork. During the last few minutes of cooking potatoes, heat heavy cream, milk and sour cream in a small saucepan over medium high heat until very warm, whisking occasionally.
Remove cooked potatoes from heat and strain any excess water from potatoes. Pour strained potatoes into a large mixing bowl. Pour melted butter over potatoes and mash potatoes with a potato masher until smooth, about 2 - 3 minutes (I wouldn't recommend using a wire type potato masher). Pour 3/4 of the very warm cream mixture over mashed potatoes, season with 1 tsp salt and pepper to taste then using and electric hand mixer on low speed blend until well combine (adding more salt as desired). Then increase speed to medium-high speed and whip for about 2 - 3 minutes, adding remaining cream mixture as desired to reach desired consistency (if you like thick mashed potatoes you may not want to add it, and if you like them thin you can add a little more milk to thin as desired), until potatoes are fluffy and smooth. Serve warm topped with gravy or butter if desired.


Continue on to Suzanne's at You Made That?

What's Cooking With Ruthie
Six Sister's Stuff The Mother Huddle
Inside BruCrew Life
Cooking Classy
You Made That?
A Pretty Life in the Suburbs
The Sisters Cafe
Jamie Cooks it Up

It wouldn't be a party without a door prize now would it?  Using the rafflecopter below put your name in the "hat" for a $200 gift card to 1 store of your choice: Target, Kroger, or Walmart - to cover your Thanksgiving dinner.  That's right, we're going to pay for someone's Thanksgiving dinner! To enter just pin this page to Pinterest.  For a couple more entries you can follow the new Pinterest board Simple And Delicious Weeknight Meals, and follow the newSimple and Delicious Weeknight Meals Facebook Page.  Won't these be handy for the busy Holiday weeknights?

Open to US Residents only. See terms for alternate entry. Winner will be notified by email on November 10, 2012.


a Rafflecopter giveaway
Share:

Friday, October 19, 2012

Homemade Tortillas - White and Whole Wheat Recipes


If you ask me, made from scratch Mexican food is just about as good as it gets. I've mentioned before that Mexican and Italian food are my two favorite kinds of food. One thing I love about each of them (other than the number one reason - the incredibly delicious flavors) is their use of so many fresh ingredients and how a lot of it is made from scratch. I've been to Mexico just a few times and one of my favorite things there was always the fresh tortillas. I loved stopping by the market to get a bag filled with a large stack of fresh flour tortillas from the bakery (I loved the fresh churros they have too, mmmm). I could probably eat that whole stack in one sitting.
These may seem like one of those things that's not worth the time and effort but I'm telling you, it is! I just don't like the flour tortillas from the store that are pre-made and loaded with preservatives, they just taste weird to me. Once you've had fresh tortillas, you know what I mean when I say homemade and store-bought aren't the same thing at all. There is the uncooked version you can get in the refrigerated section of the grocery store (which is what I use when I don't have time to make them from scratch) which are undoubtedly so much better than those you get on the shelf. Then several steps up from those are the homemade version.
These tortillas are a definite highlight of a Mexican meal. They are a simple, yet incredible upgrade. The tortilla is the first thing your going to bite into after all, so it better be good right? Enjoy!

Homemade Tortillas
Yields about 8 10-inch tortillas (you can get more then this just roll them 6 or 7-inches for taco size shells)

Ingredients:
3 cups all-purpose flour

1 1/2 tsp salt
1 tsp baking powder
1/3 cup shortening or lard (or a combo of both)
1 - 1 1/4 cups very warm water
You'll also need large Ziploc bag

Directions:
In a large mixing bowl, whisk together flour, salt and baking powder. Using your hands, rub the shortening into the flour mixture until evenly distributed (mixture should hold its shape when clamped between your hands). Pour in 1 cup water and use a wooden spoon to stir until mixture comes together, adding additional water as needed (I used 1 cup + 2 Tbsp water). Knead mixture by hand until smooth (I just did this in the bowl). Divide mixture into 8 equal portions and shape each portion into a ball. Cover dough balls with plastic wrap and let rest at least 30 minutes and up to 1 hour. 
Roll each ball out on a lightly floured surface into a 10-inch circle (for a nice circular form flatten ball slightly then roll in one direction, make a  1/6 turn roll again, make another 1/6 turn and roll again. Continue to roll and turn until your dough circle is about 10-inches across). 
Heat a large non-stick skillet over medium high heat. Place rolled tortilla in hot skillet and cook until bubbles begin to appear on the surface, then flip tortilla to opposite side and cook until golden brown spots begin to appear on bottom. Immediately transfer cooked tortilla to a large Ziploc bag and seal bag (or tuck the opening underneath that way you wont keep on zipping and unzipping the bag as you work). Repeat process with remaining tortillas. Tortillas can be stored in an airtight container at room temperature for about 2 days or in refrigerator up to 1 week.

Homemade Wheat Tortillas
Yields about 10 10-inch tortillas

Ingredients:
3 cups whole wheat flour (or 2 cups wheat flour + 1 cup all-purpose)
1 1/2 tsp salt
1 tsp baking powder
3 Tbsp shortening
3 Tbsp canola, vegetable or olive oil
2 tsp sesame seeds, optional
1 1/4 - 1 1/2 cups very hot water
You'll also need a large Ziploc bag

Directions:
In a large mixing bowl whisk together flour, salt and baking powder. Using your hands, rub shortening into flour mixture until evenly distributed, about 1 minute. Add in canola oil and mix with your hands until evenly distributed. Mix in optional sesame seeds. Pour 1 1/4 cups hot water into mixture and mix with a wooden spoon until mixture starts to come together, adding additional water as needed, then knead by hand until smooth.
Divide dough into 10 equal portions and shape each portion into a ball. Cover with plastic wrap and let rest at least 30 minutes or up to 1 hour.

Roll each ball out on a lightly floured surface into a 10-inch circle (for a nice circular form flatten ball slightly then roll in one direction, make a  1/6 turn roll again, make another 1/6 turn and roll again. Continue to roll and turn until your dough circle is about 10-inches across). 
Heat a large non-stick skillet over medium high heat. Place rolled tortilla in hot skillet and cook until bubbles begin to appear on the surface, then flip tortilla to opposite side and cook until golden brown spots begin to appear on bottom. Immediately transfer cooked tortilla to a large Ziploc bag and seal bag (or tuck the opening underneath that way you wont keep on zipping and unzipping the bag as you work then seal it shut when finished). Repeat process with remaining tortillas. Tortillas can be stored in an airtight container at room temperature for about 2 days or refrigerated up to 1 week.


Recipe Source: white tortilla recipe adapted lightly from whatcookingamerica.net
Share:

Wednesday, October 10, 2012

Amazing Dinner Rolls


Is there anything like a fresh, hot out of the oven, homemade dinner roll? Dinner rolls are a classic that will never fade. These dinner rolls are dangerously good! How could something with so few simple ingredients be so delicious? I will tell you how: lots of butter, whole milk and a little patience. While creating this recipe, I was looking to achieve a tender, pillow-y soft texture, along with a light sweetness that wasn't overpowering (if I wanted a roll that was super sweet I'd just have cake), with just the right amount of moisture and fats - hence the use of whole milk along with the butter. I prefer a larger ratio of milk than water because water has zero flavor so why let it waste good space in the roll? 
I love making fresh breads and rolls, because I let my KitchenAid mixer do all the work =). The hardest part is that "little patience" I mentioned before, the rising time. I wish they'd just go POOF! in a number of seconds and be beautifully risen. If only. The nice thing about it though is that it basically forces me to get that sink-full of dishes done while I'm waiting. If you don't have a stand mixer you could also make these the good old fashioned way, kneading by hand. 
I hope you love these rolls and serve them as the perfect complement to your holiday feasts and family gatherings. Come back soon as I'll be posting 3 specialty butter recipes that you can spread along these divine dinner rolls (as if they needed any upgrade but these butters just push the rolls over the top).  Enjoy and share... really, because I'm warning you if you don't share you'll want all 24 rolls to yourself!

Dinner Rolls
Yields 2 dozen

Ingredients:
1/3 cup warm water, 110 - 115 degrees
2 1/4 tsp active dry yeast
1/3 cup + 1/4 tsp granulated sugar
1 1/3 cups whole or 2% milk, warmed to 110 - 115 degrees
3/4 cup salted butter, at room temperature, divided
1 large egg, at room temperature
1 1/2 tsp salt
4 1/2 cups all-purpose flour*

Directions:
Measure out warm water into a liquid measuring cup then stir in yeast and 1/4 tsp sugar, whisk until yeast has dissolved then let rest 5 - 10 minutes until mixture is foamy. Pour yeast mixture (scrapping out excess) into the bowl of an electric stand mixer fitted with whisk attachment, add in 1/3 cup sugar, warm milk, 5 Tbsp butter, egg and salt. Blend mixture until combine. Add in 2 cups flour and mix until well combine. Switch attachment to a dough hook, with mixer on low speed, slowly add remaining 2 1/2 cups flour and mix until dough is smooth and elastic, about 4 - 5 minutes (dough should be slightly sticky when touched). Transfer dough to a greased, large mixing bowl and cover bowl with plastic wrap. Allow dough to rise in a warm place, free from draft, until double in size, about 1 1/2 hours.
Punch dough down and divide dough into two equal portions. Shape each portion into a ball. Roll each dough ball out on a lightly floured surface into a large circle about 13 inches across (try to keep dough as much of an even thickness as possible). Spread each circle of dough evenly with 2 Tbsp butter. Cut each circle into 4 equal quarters, then each quarter into 3 wedges (just imagine cutting pizza slices or pie slices). Roll each wedge up, beginning on wide (outside) edge. Transfer rolls to a buttered 10 x 15 inch cookie sheet (the tip of the rolled wedge should be tucked on the bottom. Note that you can fit 3 rows of 8 rolls). Cover rolls loosely with plastic wrap and let rise in a warm place until double in size, about 1 hour. During the last 10 minutes of rising preheat oven to 375 degrees.
Remove plastic wrap and bake rolls in preheated oven for 15 - 20 minutes until golden brown. Remove from oven and brush with remaining 3 Tbsp butter (you may not need all of it). Serve warm or allow to cool and store in an airtight container.

*I found 4 1/2 cups to be perfect for me but if you live somewhere very dry or humid, or at a very high altitude you may want to reduce or increase measurement by a 1/4 of a cup, just note the dough should be fairly sticky. Don't add too much flour or your roll will be heavy. The dough should be sticking to the bottom of the mixing bowl near the end of mixing just not the sides. It should stick slightly to a clean fingertip then spring back slightly when pulled away.

Recipe Source: Cooking Classy


After first rise, divide dough into two equal portions and shape each into a ball.
 Roll each ball into a 13 inch circle.
 Spread softened butter evenly over entire surface. Using a pizza wheel, cut circle into 4 equal quarters then cut each quarter into 3 equal wedges.
 Snugly roll each wedge.
 The tip of the wedge should be tucked under the bottom, like so.
 Transfer and align rolls on a buttered baking dish.
 Cover with plastic wrap and let rest until double in size, about 1 hour.
 Bake in preheated oven 14 - 16 minutes.
Coat tops with butter.
 Pull rolls apart. Serve warm.


Share:

Tuesday, May 29, 2012

Perfect Breakfast Potatoes


If you've been following my blog you've probably noticed by now breakfast is kind of my thang. I love a delicious breakfast meal served up any time of day. I mentioned before how I've posted all these main entrees for breakfast but I've never posted the sides I serve with them. 
I've been making these potatoes for many years, so I'd hope I can say I've perfected the recipe. I've tried different cooking methods, different oils, played with seasonings and now here are the exact results I was looking for. Perfectly tender interior, with a gorgeously browned exterior, slightly moist, with just the right amount of flavor and seasoning. You can use plain old salt and pepper (if you want to be boring =) or you can add some pizzazz with the delicious seasoning blend listed. Below are a few things I wanted to list, that in my opinion, make the perfect breakfast potatoes:


1. Pre-bake the potatoes. If they are cooked halfway before you fry them then they don't end up under cooked in the middle.
7. Leave the skins on when dicing. Less work (no peeling necessary), more taste and more vitamins. With that said why wouldn't you?
2. Extra Virgin Olive Oil was my favorite oil for frying. I've tried butter, bacon fat and vegetable oil and EVOO is where it's at. Not only do the potatoes taste better fried with EVOO but they are much better for you.
3. Season generously. I'm not saying over salt your potatoes, I'm saying a little flavor goes a long way. I love the flavors that garlic and onion powder add to these. Alternately if you love Potatoes O'Brian you could add diced onion, and diced green and red bell pepper.
4. Cover potatoes with a lid while frying, this helps the potatoes maintain some of the moisture as well as helping them evenly cook through.
5. Don't over-stir. If you stir too often you won't get the perfectly golden edges. Just think of flipping a pancake, you don't want to flip it before it's golden, it's the same with breakfast potatoes, you shouldn't "flip" them until they are golden.
6. Serve immediately. Potatoes get soggy after sitting too long after cooking. It's a silly thing but I always get frustrated when people are late for a breakfast meal I'm serving. Breakfast meals/sides aren't nearly as good cold or reheated. This includes breakfast potatoes.


All the above are my personal opinion. I'm not a professional chef (just wannabe =). They are tips I've found through personal experience through trial and error. I hope you love these potatoes and maybe even make them as often as I do (I make them at least once a week, sometimes even three).


Breakfast Potatoes
Yields about 5 servings 


Ingredients:
5 small Russet Potatoes (total weight should be about 1.5 lbs)
1/4 cup Extra Virgin Olive Oil 
1 1/2 - 2 tsp Herb Seasoning, to taste (recipe can be found here)


Directions:
Preheat oven to 400 degrees. Meanwhile rinse and scrub potatoes then pierce each potato several times with a fork. Bake potatoes in preheat oven for 35 minutes. Remove from oven, allow to cool 30 minutes then chill overnight (alternately you could dice and cook potatoes immediately, I've just found it's more convenient to bake them ahead of time when I'm already making baked potatoes for dinner or baking another dish. Also, potatoes seem to cut cleaner if they've been chilled). 
Dice chilled potatoes into 1/2" cubes. Pour extra virgin olive oil into a 10" non-stick skillet and heat over medium high heat. Once oil barely begins to smoke, carefully pour diced potatoes into hot oil. Immediately sprinkle with Herb Seasoning then toss potatoes with a heat proof spatula. Cover pan with lid and cook potatoes, stirring every few minutes as they begin to lightly brown on bottom, about 8 - 12 minutes until potatoes have reached desired tenderness. Serve immediately. 
Note: sometimes I like to sprinkle them with a few tablespoons of Parmesan cheese after frying (cheese is good over nearly everything). Also, they are delish drizzled with ketchup, yep I'm all American with my side of Ketchup =). It's like french fries without ketchup, it just shouldn't be done.

Share:

Wednesday, May 23, 2012

My Idea of the Perfect Scrambled Eggs


After posting banana bread pancakes the other day I realized I haven't even posted the sides I always serve with my breakfast entrees. Well it's about time I do. Most often I serve the the entree with a side of these scrambled eggs and breakfast potatoes, then on special occasions with bacon. 
This is one of those recipes I had to actually had to sit down and measure out what I put in it because it's always been a little of this and a dash of that. I believe one of the most important factors to perfect, fluffy scrambled eggs it stirring/folding them constantly. Every cook has their opinion on what temperature they should be cooked at, some say low and slow and other say high and quick. In my opinion medium - high is perfect. 
The seasoning used for these is one I've been using a lot lately, most often in breakfast dishes. I think I would say it's slightly Italian. It compliments eggs perfectly. You can use the remaining seasoning for burgers or chicken. It's a quick, simple way to add delicious flavor. Enjoy!


Scrambled Eggs
Yields about 4 servings


Ingredients:
8 large eggs
1/2 cup milk*
1/2 Tbsp butter
2 oz grated Cheddar or Monterrey Jack cheese (I use 1 oz of each)
1 Tbsp grated Parmesan cheese
1 tsp herb seasoning, recipe follows or salt and pepper to taste


Directions:
Preheat a 10" non-stick skillet over medium high heat. Crack eggs into a blender, add in milk  (cover with lid) and blend mixture on low speed for 10 seconds. Melt butter in saucepan by spreading it along bottom and edges of skillet. Once butter has lightly begun to bubble, pour blended egg mixture into pan and immediately sprinkle with cheeses and seasoning. Stir eggs CONSTANTLY (a key to perfect eggs) with a spatula, making sure to scrape along the surface of the pan to prevent bottom from browning and a skin from forming. Cook eggs for 3-4 minutes to desired wetness/dryness of eggs (note: they will continue to cook slightly once removed). Remove from heat and serve immediately.


*sometimes I like to do 1/4 cup milk and 1/4 cup buttermilk


Add in ideas:
Diced ham
Fresh salsa (reduce amount of milk if adding this)
Sliced mushrooms
Diced tomatoes
Spinach
Diced avocados
Crumbled bacon


Herb Seasoning


Ingredients:
1 Tbsp salt
1 1/2 tsp freshly ground black pepper (call it your workout for the day)
2 tsp onion powder
2 tsp garlic powder
1 tsp dried parsley
1/4 tsp dried oregano
1/8 tsp dried basil
1/8 tsp dried thyme


Directions:
Whisk together all ingredients in a mixing bowl. Store in an airtight container for up to several months. This seasoning is also great for burgers, chicken, twice baked potatoes and breakfast potatoes.
Share:

Monday, May 14, 2012

15 Minute Stove Top Mac and Cheese


Mac and cheese - comfort food at it's finest and with this recipe at it's fastest! I love how simple this recipe is. How could something so easy yield such rich, flavorful results? Who could ever make a box mix again after making it homemade? 
When creating this recipe I added a few unusual ingredients because I love adding just a bit more excitement to food. The liquid smoke flavor, Dijon mustard, onion powder and garlic powder blend in so well you hardly know they are there. They just enhance the dish, not overpower it. I love the combination of Cheddar and Monterrey Jack cheese, they are my two favorite cheeses so of course they had to be the two cheeses I used to make this recipe. They both melt so smoothly to create a perfectly silky, decadent macaroni and cheese. Enjoy!


15 Minute Stove Top Mac and Cheese
Yields about 4 servings


Ingredients:
8 oz. elbow macaroni noodles
3/4 cup milk (I'd recommend 1% or 2%, whole was too rich)
1 Tbsp butter
1/4 tsp onion powder
1/8 tsp garlic powder
6 drops hickory smoke flavor, such as Liquid Smoke
1/2 tsp Dijon mustard (or 1 tsp if you like more mustard flavor)
1/4 tsp salt, or to taste
2 large egg yolks
1/2 cup evaporated milk
4 oz. Medium or Sharp Cheddar cheese, grated
3 oz. Monterrey Jack cheese, grated
Freshly cracked black pepper or cayenne, for garnish (optional)


Directions:
Cook pasta according to directions listed on package until cooked through (just past al dente), and drain. 
Meanwhile (in order to make this a 15 minute recipe I made the sauce as the noodles were cooking), in a medium saucepan combine 1% milk, butter, onion powder, garlic powder, liquid smoke, Dijon mustard and salt then scald mixture over medium heat. In a mixing bowl, whisk together egg yolks with 1/2 cup evaporated milk. Add 1/4 cup scalded milk mixture to egg yolk mixture and whisk, then pour and whisk mixture into saucepan. Cook mixture over medium low heat, stirring constantly, until mixture coats the back of a wooden spoon, about 3 minutes. Add cheese and drained pasta to sauce mixture and gently toss mixture with a rubber spatula until cheese has melted. Serve immediately sprinkled with optional black pepper or cayenne pepper. 


Recipe Source: Cooking Classy

Share:

Tuesday, April 17, 2012

Authentic Mexican Rice


In my opinion there are two Mexican sides that are a must with nearly every Mexican entree, beans and Mexican rice. This recipe is my go to Mexican Rice recipe that I've been making for years. I make it at least once a week, some weeks as many as three times a week. It only takes a few minutes to prepare and it tastes just as good as any authentic Mexican restaurants Mexican rice. I have tried several different recipes for Mexican rice and this one is definitely my favorite. I've tried using tomato sauce and fresh tomatoes but I think the key to great authentic Mexican rice is the Caldo de Tomate. You can find it in the Latin section of the grocery store. My sister gave me the recipe and I added my own additions to it, you will see them where I listed optional ingredients. This rice can be made with or without those but I love the extra boost of flavor they give the rice. Also, I used to always use vegetable oil but I've tried to be a bit healthier =) so I've switched over to olive oil so just use which ever you prefer. I hope you love this rice and that it becomes a staple in your home as well. Enjoy!


Authentic Mexican Rice
Yields about 4 servings


Ingredients:
1 Tbsp extra virgin olive oil or vegetable oil
1 cup uncooked long grain white rice
2 cups warm water
1 1/2 tsp Caldo de Tomate (I use Knorr brand)


Optional ingredients:
1/2 tsp onion powder
1/2 tsp garlic powder
1/4 tsp freshly ground black pepper
1/4 tsp chili powder


Directions:
In a mixing bowl whisk together water, Caldo de Tomate, optional onion powder, garlic powder, black pepper and chili powder, set aside. Drizzle oil into a non-stick saucepan and heat over medium high heat.  Add rice and cook several minutes, stirring constantly until rice is slightly puffed and golden. Add water mixture to rice then stir and cover pan with lid.  Reduce heat to low and allow rice to simmer for 20-25 minutes until water has been absorbed (you'll notice water bubbles stop coming to the surface). Remove from heat, fluff rice with a fork, cover with lid and allow to rest 5 minutes. Serve warm.


Note: I also love this rice served with a drizzle of sour cream, a few dashes of Mexican hot sauce (such as Tapatio) and some fresh guacamole. Just a few more flavor boosters I sometimes add that are optional.


Recipe Source: Cooking Classy


Share:

Saturday, March 10, 2012

Broccoli Cheese Mashed Potatoes


These potatoes are so divinely delicious and full of cheesy goodness that they could easily be counted as dinners main course and no longer the plain old side kick.  The best way to describe these potatoes: broccoli cheese soup meets mashed potatoes.  Don't get the wrong idea from that though, these potatoes aren't soupy.  They are fluffy, flavorful and oh so cheesy, with all the right amount of nutrition from the broccoli =).  They are mashed potatoes made luxurious.  One thing I love about these potatoes is that you don't need drippings from meat for gravy, just a whole lot of velvety cheese. I hope you enjoy these irresistible Broccoli Cheese Mashed Potatoes as much as I do! 
If you like these you may also like to try my recipe for Twice Baked Potatoes.  They are loaded with cheese, drizzled with zesty ranch, then finished off with crispy bacon and green onions, yum!   


Broccoli Cheese Mashed Potatoes
Yields 6 - 7 servings


Ingredients:
3 lbs Russet Potatoes
6 3/4 cups cold water, divided
3 cups broccoli florets
3/4 cup whole milk
1/2 cup heavy cream
3 Tbsp butter
1/3 cup sour cream
2 1/2 cups freshly grated medium or sharp cheddar cheese
1/4 cup freshly, finely grated Parmesan Cheese
1/4 cup freshly, finely grated Romano Cheese (or an additional 1/4 Parmesan cheese if you don't want to purchase both)
1/2 tsp onion powder
1/4 tsp garlic powder
Salt and freshly ground black pepper, to taste


Directions:
Peel and dice potatoes into about 2 inch pieces (I used medium potatoes and cut each into 6-8 pieces).  Place diced potatoes in a large pot, cover with 6 cups cold water. Cover pot with lid and cook potatoes over medium high heat for 25 - 30 minutes until potatoes are very tender when pierced with a fork.  
Meanwhile, steam broccoli by placing broccoli in a microwave safe bowl with 3/4 cup water and microwaving on high power for 4 - 5 minutes until very tender (alternately you can steam the broccoli in a steamer basket placed in a saucepan with water over the stove top until tender).  Drain water from broccoli and dice broccoli into tiny pieces, set aside.  Warm milk, cream and butter in a saucepan over the stove top or in the microwave in a microwave safe bowl.
Drain water from potatoes.  Pour potatoes into a large mixing bowl.  Mash potatoes very well with a potato masher.  Add in warm milk mixture, sour cream, Cheddar Cheese, Parmesan Cheese, Romano Cheese, onion powder, garlic powder, salt and pepper then whip mixture with an electric mixer on medium speed about 1 - 2 minutes until fluffy and smooth.  Fold in broccoli.  Serve warm garnished with additional shredded Cheddar Cheese if desired.

Share:

Tuesday, February 14, 2012

The Old Spaghetti Factory's Creamy Pesto Salad Dressing


One of my favorite places to eat is The Old Spaghetti Factory. Why? I LOVE their pesto salad dressing.  I came up with this recipe so I can enjoy it at home. We eat it about once a week in my home. Not only do I use it to dress my salad, but I also use it as a veggie dip, a sandwich spread and I even love dipping pizza in it (healthy I know =). This recipe is so simple and super quick to make! Try this recipe and I think it will become a staple in your home too.
I would highly recommend serving this over a simple green salad with homemade croutons, once you've had homemade croutons you can never go back to store-bought.


Spaghetti Factory's Creamy Pesto Salad Dressing
Yields about 2 1/2 cups

Ingredients:
1 cup mayonnaise
1 1/4 cups low-fat buttermilk
1 1/2 Tbsp dried basil
1/2 tsp garlic powder
1/8 tsp salt
1/8 tsp fresh ground black pepper
1/4 cup freshly, finely grated Parmesan cheese

Directions:
Combine all ingredients in a medium mixing bowl. Whisk until smooth and creamy. Pour into an airtight container and refrigerate 1 hour (this will help the flavors develop, I don't always do it if I don't have an hour to wait). Serve over salad or use as a dip.

Share:

Wednesday, February 1, 2012

Cheesy Refried Bean Dip


Funny thing, I would really consider this bean dip one of my favorite foods (although I do have a lot of favorite foods =).  When I lived in Arizona I often went to two amazing Mexican restaurants that served warm refried bean dip alongside their fresh salsa, it was incredible to say the least!  Unfortunately, I no longer live there so I had to figure out how to make it on my own.
This is the perfect party snack for the upcoming Super Bowl.  Make this and no one is going to care who wins =). When I make this I often serve it along with fresh salsa, fresh guacamole and sour cream.  They all accompany each other perfectly.  This bean dip is SO easy to prepare, yes it takes a bit of time to cook but the actually prep time is about 5 minutes.  I also use this same recipe to make refried beans, just decrease the reserved water added to the blender to 1 1/4 cups for non dip, slightly thicker beans.  I love refried beans served alongside Shredded Beef Tacos and Chicken Enchiladas with Green Sauce.  
This bean dip can be stored in the refrigerator in an airtight container for up to a week, and reheated on the stovetop on in the microwave (I usually add a bit of water when I reheat it because they seem to thicken a bit once refrigerated).  I even use this recipe to make my own frozen bean and cheese burritos, again decreasing the water added slightly then adding additional cheese.


Cheesy Refried Bean Dip
Yields about 5 cups


Ingredients:
1 lb dry pinto beans
2 quarts (8 cups) water
2 Tbsp butter
2 Tbsp lard (or 2 additional Tbsp butter)
1 tsp salt, or to taste
1 1/2 tsp chili powder
2 tsp onion powder
3/4 tsp garlic powder
1/4 tsp ground cumin
1/4 tsp freshly ground black pepper
1/2 cup shredded Cheddar Cheese (plus more if desired)
1/2 cup shredded Monterray Jack Cheese (or an additional 1/2 cup Cheddar)


Directions:
Soak beans in a bowl or pot overnight in 2 quarts cold water (I just soak them in the slow cooker pot so I don't have to clean two pots).  
Drain and rinse beans after soaking.  Place beans in a slow cooker, cover with 2 quarts hot water.  Cover with a lid and cook on high for 4 1/2 hours or low for 9 hours (my slow cooker lids fits snugly but if yours doesn't just keep an eye on the water level to make sure they stay covered).
Once cooked (they should be fully tender when pierced with a fork), laddle out 1 3/4 cups of the water and reserve.  Strain remaining water by pouring beans into a colander.  Place beans, reserved 1 3/4 cups water (if you want thicker beans start with 1 cup then work your way up from there, I just found 1 3/4 cups was a good consistency for bean dip), butter, lard, chili powder, onion powder, garlic powder, cumin and pepper in a blender.  Cover blender with lid and blend on low speed for about 1 minute or until well blended.  Pour mixture into a large bowl, stir in shredded cheeses.  Serve warm with tortilla chips.  
Store in an airtight container in refrigerator up to 1 week.

Share:

Blog Archive